I mentioned in the Fall Subway Art post, that I thought it would be fun to display the prints in a new way and decided to just tape the print to a wood pumpkin. I didn't take pictures of the steps this time, but I think it's pretty easy to see how it's done if you decide to make one.
Supplies
Square block of wood
(This block is from a 2 x 6 which really measures @5 1/2" square.)
(This block is from a 2 x 6 which really measures @5 1/2" square.)
Paint and Foam Brush
Scrapbook Paper
Ribbon
Sand paper
Distress Ink or Dark Stain
Mod Podge and a Foam Brush to apply
Small piece from a branch
Reindeer Moss (or whatever you have on hand)
Leaves to embellish (wood, fabric, or artificial)
Craft Wire
4" x 5" Photo (optional)
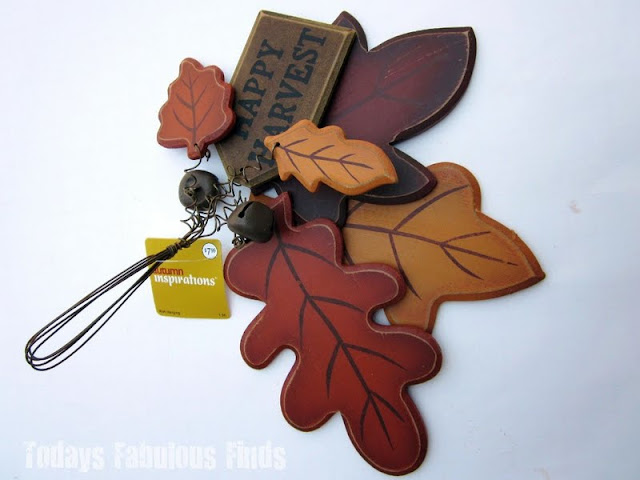
When I was at JoAnn Fabrics the other day I saw this bunch of painted wood leaves. They were priced at $7.99 and then were 40% off. I already had a purpose for the larger leaves and thought the smaller ones would look great on a little wood pumpkin.
Directions
- Sand the edges of the block (an electric sander gets the job done quickly)
- Wipe off any sawdust with a damp rag or paper towel.
- Paint. (I bought one of Lowes sample paints in black to try and was impressed with how much nicer the paint looked when applied than acrylic craft paint.)
- Allow paint to fully dry.
- Sand all of the edges and corners to distress.
- Wipe over the edges with an ink pad (dark walnut works well) or with some dark stain on a rag.
- Cut out a piece of scrapbook paper about 3/8-1/2 inch smaller than the wood block. Run an ink pad over the edges to give it a distressed look. (I used scrapbook paper from a book by My Minds Eye, that was discontinued, but I just saw some really cute Fall prints at the craft store. I'm sure you'll find something that you'll like, most likely even cuter than the paper I used.)
- Apply Mod Podge to the front of the wood block and press your scrapbook paper down over it. Allow to dry.
- Mod Podge over the scrapbook paper running your brush in the same direction. Then with a dry brush, run it in the opposite direction to give it a mat look.
- For the stem, cut off a small section from a branch (large pruning shears will work or a small hand saw) and hot glue it to the top center of the block.
- Use wire to attach the leaves. Curl the ends around a pencil.
- Hot glue moss around the stem.
- Cut a length of ribbon long enough to go around the block and hot glue or tape it together in the back. (I bought this ribbon at JoAnn's in the Fall section.)
- Tape or use sticky tack to add a photo, quote, etc.
When I was done, my daughter said, "Mom, you know that pumpkins aren't black don't you?" Yes, it's true, generally pumpkins aren't black, but I painted the block thinking I'd make something else with it and then was too lazy to repaint it orange when I decided to make a pumpkin with it instead. I'm okay with a black pumpkin, I'm really not too picky, at least when it comes to pumpkins. ;)
For more ideas, here are links to the [orange] 2x4 pumpkins that I made last year.
Today's Fabulous Find...Wood Pumpkins
Linking up to these fun parties...


6 comments:
VERY cute. Thanks for sharing the tutorial!! :)
such a cute project, janet--thanks for the tut! your 2x4 pumpkins are so cute, i think i'll try them, too:)
Way cute - I'm totally gonna make it!
Love this, great job!
SO inspiring! I must make something similar to add to my holiday decor! You always have such great ideas here! I would love for you to share this @ Show & Share!
http://southernlovely.blogspot.com/2011/09/show-share-7.html
Great ideas. It would be great to have you link this post to my weekly meme Seasonal Sundays.
- The Tablescaper
Post a Comment