12.31.2012

Top 12 Projects of 2012

How is it that we're already saying goodbye to another year?   It's hard to believe that today is New Years Eve!  I thought it would be fun to take a look back at your favorite posts here at Today's Fabulous Finds, so here they are...the top 12 of 2012.

#12
This post includes links to how to build the mantel shelf, paint stick crate, framed shelf, framing a shelf, Spring wreath, bird in a dish, and the quote plate.)


#11


#10
(This post shows how I made and painted this HUGE frame to use for my Valentine Mantel.  It's currently hanging in my hallway and I use it to keep track of my kids school notes, assignments, calendars, pictures they color, etc. I love that the clothespins, unlike magnets, can hold quite a few papers in a stack at one time, including manila envelopes.)


#9


#8
(This is a group game that is a combination of several well known games that we played at an activity with the women at my church.  It would be fun to play at a family reunion too.)


#7
(This is one of my favorite makeovers, it's hard to believe that it's the same frame!)


#6
Wheat Grass Centerpieces 
(Grown on Paper Towels) 
(This post includes three display ideas.  I was amazed at how well it grew on just four layers of paper towels!)


#5
(This frame was made from an old nasty looking window/door that I bought for $1.  If you haven't already, you've got to see the before!)


#4
(This post contains links to tutorials for all of the items used in this mantel.)


#3


#2
(Tutorial on how to make a cluster of fabric flowers to add to a wreath that can easily be removed at the end of the season.)


#1
(Tutorials on how to make a rustic wood planter and how to grow wheat grass.)


The planter was made with a cedar fence slat that cost just over $1.  This post includes a daily photo log of how fast the grass grew each day.  I will for sure be growing wheat grass again this Winter, sometime when I need a little boost of green to get me through until Spring!

At the close of this year I want to tell you all thank you for reading!  It's your sweet comments, pins, and features that encourage me to keep writing and sharing. :)  I hope this new year is a good one for you!  Have fun tonight!

Happy New Year!


Pin It!

12.20.2012

Kids Boredom Buster: 'Ping Pong Pan' Game with Free Printable

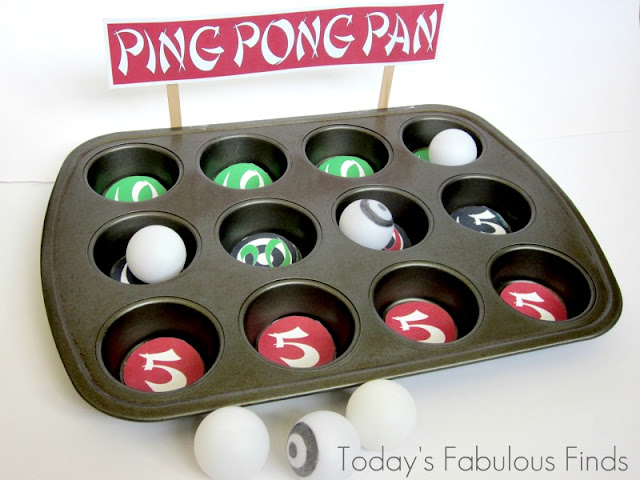
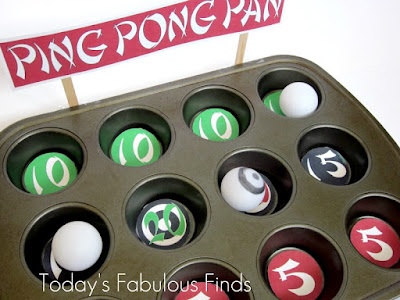
This is a simple and fun (last minute) game that I put together for our end of the year party at Cub Scouts--I'm calling it Ping Pong Pan (I know, pretty creative right?).  There were children there from ages 5 to 10 who played and they all did really well!  In fact, one of the youngest players earned the highest score in one round. This game would be fun to play at a classroom party (could use multiple muffin pans for a large group) or at home over the Winter break as a boredom buster.


Ping Pong Pan
Fun for all ages
Supplies Needed:

  • Muffin Pan (Really doesn't matter if it's old and stained or brand spankin' new, the kids won't care.)
  • 6 Ping Pong Balls (Draw targets with a Sharpie marker on two of them.)
  • Printable Sign and Point Circles (Printed on card stock and taped to the bottom of the muffin cups.)
  • 2 Popsicle Sticks (Tape them to the sign and then to the edge of the muffin pan)
For Personal Use Only


The Rules:
  • Stand behind a piece of tape on the floor (placed approx. 5 to 6 ft. back).  Throw all 6 ping pong balls, one at a time, however you like (they can bounce on the ground or off of the sign first) and try to get them to land in the muffin cups.
  • If a ball with a bulls-eye lands in a cup with a bulls-eye, double the score (40 points).  If both bulls-eyes land in the center bulls-eye cups in one turn, double your entire score for that round. 
  • Add up the points at the end of your turn and add your score to your previous points (very good for sneaking in some math skills!)
  • Play for a predetermined number of rounds or set a time limit.

Have fun!

Today's Fabulous Find...
Kids Boredom Buster: Ping Pong Pan Game with Free Printable


Pin It!

12.19.2012

Small Neighbor Gift Ideas

 Today my goal is to finish up my 'neighbor gifts' for this year--before it's too late to give them away.  I'm having a hard time with the fact that there is less than a week left before Christmas--this season has flown by way too fast and I'm not ready for it to be over.

While I'm finishing up, I thought I'd post links to some of the small gift ideas I've posted in the past for any of you who are on the hunt for a last minute small gift idea.


(My kids love to play this game!)


Christmas Subway Art:  Version One and Version Two
(Print and Frame, or use as a Christmas Card)


There is also a paper sack version that is simple to put together.


(These are good!)


These small gift ideas were originally used as door prizes, but some of them could be adapted and also be given as small 'thinking of you' gifts.  For ex. If I was to give the platter as a gift I would put a yummy treat on it first. :)


Version One (on a Wood Block) and Version Two (Printed on Card Stock and Framed)
The twelve day countdown to Christmas is already well on it's way, but your kids/grand kids might still enjoy making the printable framed version for the last remaining days.

For more ideas, click over to Today's Fabulous Finds project gallery.

Have a Great Day!


Pin It!

12.17.2012

Remembering...

Last Friday was such a wonderful and joyful day for my family and I.  My heart was full of happiness and love as we spent the entire day celebrating my sister's wedding.  It wasn't until late Friday night after we had traveled home and my kids were all tucked in bed that I turned on the computer and learned about the devastating news from Newtown, Connecticut.  My heart then broke as I watched the news stories of these brave young children and their teachers who lost their lives.  My thoughts and prayers are with their families and with the community of Newtown as they try to heal and find comfort.  


As we hug our loved ones a little tighter, may we always remember those who lost their lives in this terrible tragedy.


Pin It!

12.12.2012

Handmade Pine Cone {flower} Ornaments

It seems as though I'm still hooked on these little pine cone flowers!  Probably because they are free and so darn cute!  The other day I went to put away a package of foam balls that was leftover from my son's science project (a pretty fierce looking Black Widow Spider!) and found myself imagining them completely covered in adorable little pine cone flowers.  The thought got me so excited that I went to work and made a few.  Can I just say that I love how natural these pine cone ornaments look on my Christmas tree--love!


I took the ornaments outside to photograph them in better lighting-- 
sure wish I'd noticed that little strand of hot glue before I took the pictures!  
(You probably didn't even notice it and now I just pointed it out to you!)


They are simple but take some time to make.  It's a perfect time to watch a holiday movie--you can listen to the movie and look up enough to see what's happening, but you won't miss much if you need to focus on the project.  I suggest starting with The Twelve Dates of Christmas, have you seen it?  I thought it was a cute show.

Tip:  I set a sheet of (.30) poster board on my kitchen table to do my crafting on.  I can paint, stain, glue, and my table remains protected.  When I need to move the craft for dinner, I pick up the poster board with my project mess still on it and  temporarily move it to another location.  When I'm all done the poster board goes back out to the garage to be stored until the next project.

How to make Pine Cone {flower} Ornaments

Supplies:
  • 2 1/2" Foam balls (I bought mine at a dollar store, can't beat 8 for a dollar!)
  • Paint and Foam Paint Brush
  • Jute
  • Hot Glue Gun and Glue
  • Small 1-2" Long Pine Cones
  • Handheld Garden Pruners
  • Ribbon (optional)

Directions:

Paint the foam ball so the white foam doesn't show through the pine cones.  (Hindsight: Black paint might look better.)

Cut the pine cones into little flowers using small handheld pruning shears.  Tutorial here.

Hot glue into place, fitting them as closely together as you can.  (I tried to line them up as I went.)

Glue the jute hanger to the top then fill in with pine cones flowers.

Tie a ribbon bow and pin it to the top of the ornament with a straight pin.  (Or hot glue it on if you're sure you want it there permanently.) I was able to use ribbon from my stash.

*Use the tips of the pine cones to make the version pictured below.  You can make one of these for every two ornaments you make with flat flowers (approximately).


 If you have access to free pine cones (thanks Grandma!), ribbon, jute, paint, and hot glue on hand, and a dollar store that sells foam balls nearby (Dollar Tree), then you too are very fortunate and can make these ornaments for .15 each--not too bad!


The ornaments also look pretty hanging on a doorknob or in a basket/tray if you only have the time and/or patience to make a few!

Today's Fabulous Find...Handmade Pine Cone Flower Ornaments


If you like the Pine Cone Flower Ornaments, you might also like:

Sharing at...
Pin It!

12.04.2012

DIY Printable Paint Stick Ornaments: Names and Attributes of Christ

When I was choosing a name for this blog there were a lot of possibilities, but the name that seemed to fit the best was Today's Fabulous Finds--Tomorrow's Treasures.  I chose this name because I love the challenge of finding items that are ordinary, in-expensive (like paint sticks), or simply worn-out, and turning them into little 'treasures' for my home.  There is a satisfaction (and a happiness too) that comes when you use your creativity to make something that is uniquely your own!  That said, my greatest treasures in life will always be Jesus Christ and His gospel and my family.


I thought it would be nice to make something special with an emphasis on Christ for this Christmas season so I decided to make a new set of Paint Stick Ornaments for my Christmas tree.  This set includes 30 Names of Christ (pictured above) and 14 Christlike Attributes.  I also purchased over a dozen different 3"x 4" pictures of Christ to frame and hang on the tree alongside them.


The ornaments are really pretty simple to make and cost very little money.  They're made by photo copying black and white templates onto scrapbook paper and then Mod Podging them onto a 4" piece of a 5 gallon paint stick.  You can make four paint stick ornaments and a snowman ornament from just one 5 gallon paint stick.


The templates can be used in other ways as well:
  • Leave the wires off, attach magnets to the back, and use them for refrigerator magnets like the Teacher magnets that my sister designed.  
  • Make the ornaments/magnets into an inexpensive Christmas gift by tying three (Faith, Hope, and Charity for ex.) or four of them together with a pretty ribbon.
  • Tie an ornament onto a gift to use as an embellishment.

(My thanks to Amber M. for suggesting the words for the Christlike Attributes.)
  • When you copy the templates, decrease the size with the copier settings to use them for smaller magnets.  Use the width of the paint stick instead of the length.  (I haven't tried this, but I think it would work.)
  • Enlarge them with a copy machine then copy the names onto scrapbook paper and Mod Podge them onto a 2x4 piece of wood.  Add wire photo holders to the top to hold pictures of Christ and/or your family.


  • My plan is to put the ornaments in a basket and then each time a family member does an act of service for someone else they can choose an ornament to hang on the Christmas tree.  If you'd like to be more specific for smaller children you could even tape a slip of paper to the back of the ornament with the service already written on it.
  • Use them as an advent calendar by adding a scripture, storybook title, or a Christ-Centered Christmas activity to the back of an ornament for each day leading up to Christmas.  You could make the countdown as long or as short as you like.  Hang one ornament on the tree each day.


  • I chose not to add any Christmas clip-art to the names of Christ so that they can be used year round for various projects at home or at church, as well as for Easter. 
  • Make them as small signs (without the hanger wire) and group several of them together with a frame around them to hang on the wall.  This could be done without Mod Podging them onto the wood paint sticks, just copy them onto your favorite scrapbook paper and place the papers closely together under the glass in the frame in a patchwork pattern.

If you have any other ideas on how the templates could be used,
 please, please share them in the comment section!


Template Example

This is a low resolution image.
Do not use this, you will be disappointed.

 These Printable Templates are to be used 
FOR PERSONAL USE ONLY 
to use in your own home, church, or to give as a gift.

They cannot be used on any items for sale or profit, 
this includes fundraisers, sorry no exceptions.
  • Print the templates with your home printer onto white printer paper, using the normal or high quality setting.
  • Copy the template onto scrapbook paper using a copy machine.  Choose the paper you like, but keep in mind that lighter to medium toned prints that aren't busy work best. The red paper pictured below was too dark.  
 This is an important step.  If you print it on an ink jet printer and don't use a copy machine to copy it to the scrapbook paper, your ink will run and blur when you Mod Podge the paper on.  ( Exception:  If you have a laser jet printer you can skip this step and print it directly onto the scrapbook paper, I've been told that the ink won't run.)

Click here for the full tutorial.


Tips:
  • Adjust the copier to the darkest copy setting for nice dark letters and when copying on scrapbook paper with a texture.  
  • Use a Q-tip to apply distress ink around the edge of the paper.

I'm so happy to finally be sharing these with you, it took me awhile to get them done!  I hope that I've left you enough time with your busy holiday schedules to make them for your family, friends, or for your neighbors this year if you'd like, and that possibly they might even become one or your family's 'little treasures'.


"Because He came to earth, we have a perfect example to follow.  As we strive to become more like Him, we will have joy and happiness in our lives and peace each day of the year.  It is His example which, if followed, stirs within us more kindness and love, more respect and concern for others.

-Thomas S. Monson

Today's Fabulous Find...Names of Christ and Christlike Attributes Handmade Ornaments


You might also be interested in the first set that was posted a couple of years ago...


Pin It!

LinkWithin

Related Posts with Thumbnails