
I was so motivated after Tuesdays Halloween Countdown Calendars post, that yesterday I dug through my thrifting treasures and found all of the things I needed to make one of my own! I guess I won't be using a printed one this year after all. :)
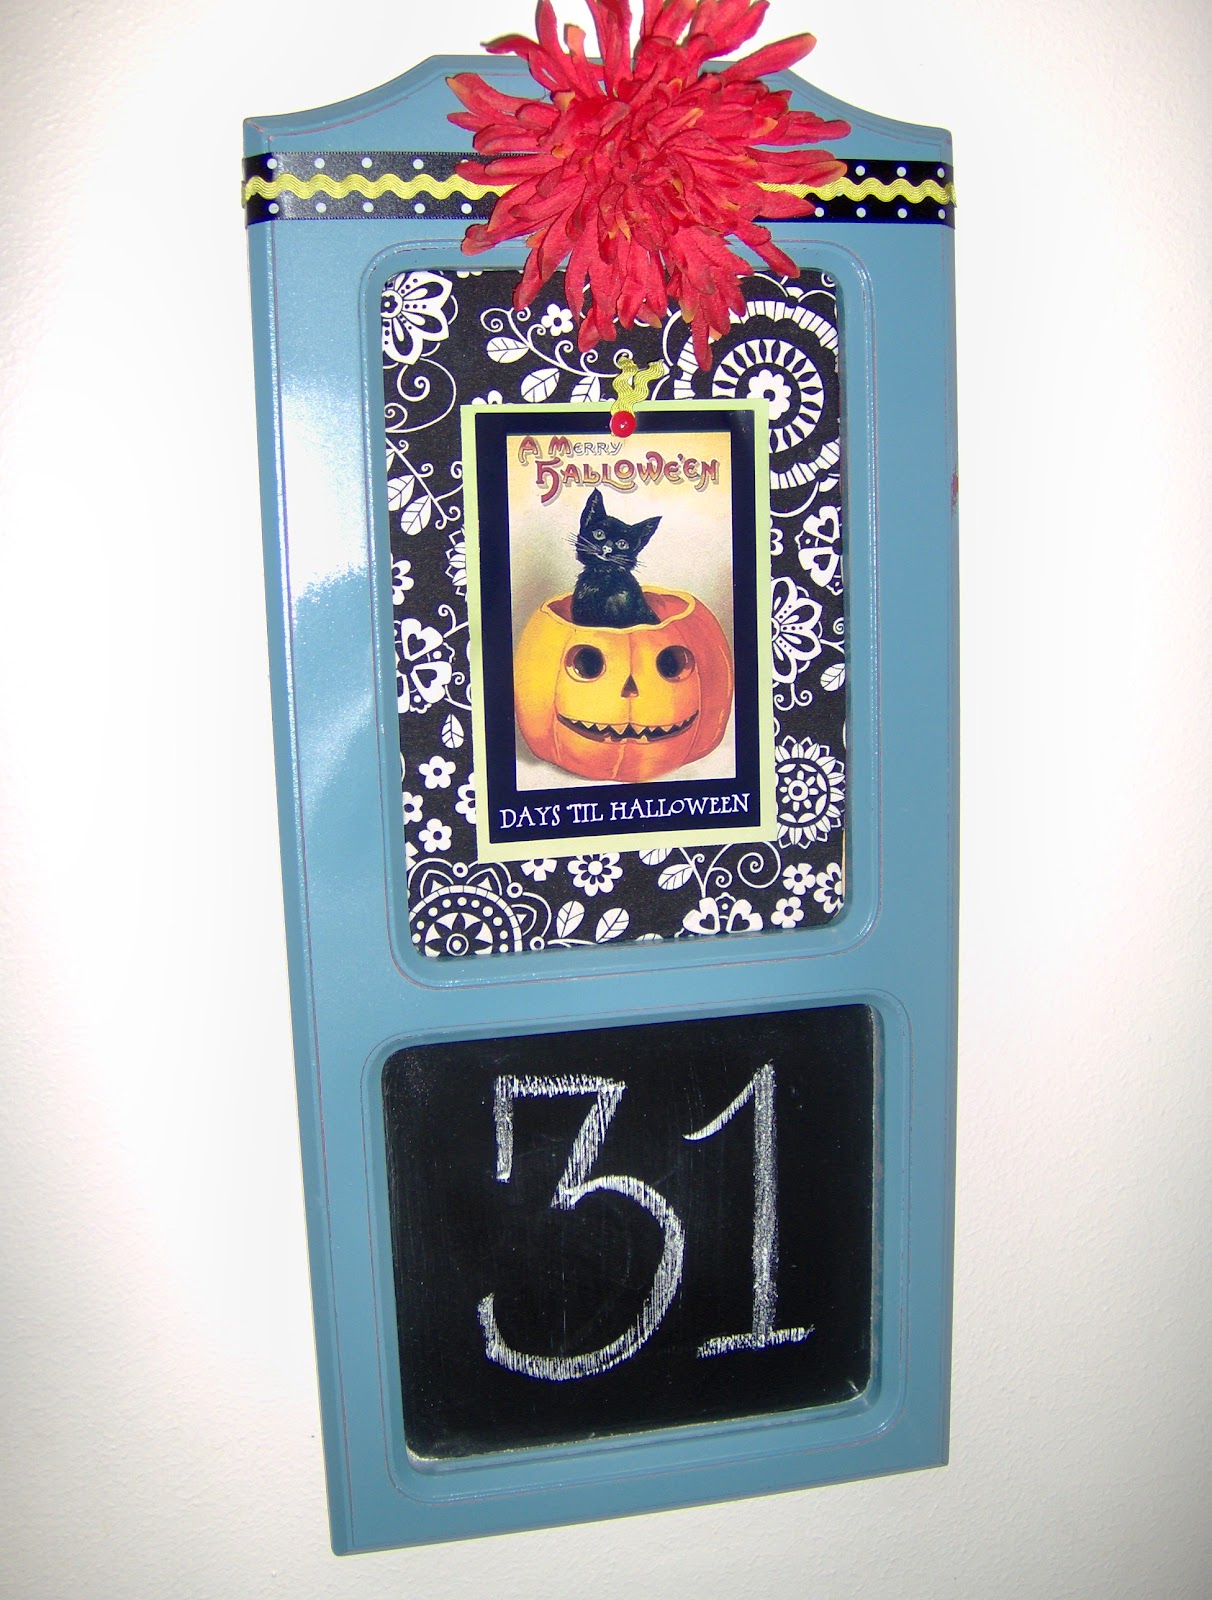
Here's what I made:

The best part about this countdown calendar is that it's interchangeable. That means we can use it for every holiday/birthday countdown by simply changing the pictures.
Do you want to see what it looked like before? Of course you do! Who doesn't like to see a before and after?
Here's what it looked like before I got my hands on it. I bought it at a thrift store for $1.50.


The corkboard cost .50. I cut it to the shape of the calendar slot, sprayed on some adhesive spray, and then wrapped the fabric over it.

The paint color is Bahama Sea. After spray painting it I distressed it a bit to let some of the red through. I covered the calendar slot, when I was painting, to keep it clean in case I want to put a picture in it sometime instead of the cork board (which is snug enough it didn't need to be glued in).

The chalkboard paint only cost a few dollars at Wal-mart. This is the first time I've painted with chalkboard paint. I was a bit surprised by how globby it is. I used a foam brush to apply two coats.

The chalkboard paint directions say to let it cure for 24 hours. I patiently waited for the correct amount of time before I wrote on it took out my hair dryer after 4 hours and tried to speed things along, then I went ahead and wrote the numbers on it! It seems fine, so hopefully it will stand the test of time. :) I know my kids are going to have fun writing the new number on every day.
I already had the paint, ribbon, rick-rack, and the flower from other projects, so I consider them free!
The fabric was from a fat quarter from JoAnn Fabrics. It cost under $2.

You can find this vintage Halloween picture here, as well as a few others. I added the black border and text and then printed it on photo paper. The font is called Bosshole.

I think my favorite part of crafting is when the ideas just seem to fall into place and I'm able to use items that I already have, to make something fun and new. If I only add up the cost of the materials that I used, then it ended up costing me around $5 to make!

By the way, the red splotches on the frame weren't intentional. The paint peeled off before it was dry. Ugh! I was a bit frustrated by it until my 6 year old daughter said, "That's okay Mom, it just makes it look old."


This post is linked to:


Be sure to check these parties out. They ALL have SO MANY great ideas!


16 comments:
Absolutely adorable!!! I love that you can use this for more than one season. Very cool project. :) Stopping by as this week's CSI Judge. :)
I'm absolutely loving what you did with this. Very cute and love that you can use it for holidays and birthdays. My kids would love to countdown to their birthdays. Fun idea.
Wow! It looks so cute compared to what it looked like before. Nice job!
That is really cute. I've been thinking of making a magnet/cork board for my office. I'll have to remember the chalk paint. That would work great for making lists.
I always love it when a project falls into place too! Your calendar turned out wonderful.
Thank you for stopping by Dittle Dattle and you're welcome for the "TREATS" sign download.
This is really cute! I love that vintage are with the black cat!
What a cute idea!
Thanks for your sweet comment on my blog. :) And I LOVE this project. Actually... I am totally jealous! I want this for my own house and you got such a great deal at the thrift store. This is seriously AWESOME! :)
Janet- I lOVE this countdown calendar! I am so going to Salvation Army tomorrow to see if I can find something like that! You did a great job! It was funny how you had to break out the hair dryer to dry the paint. That is so me! I get so impatient to see what it's going to look like. I found you on JAG. Stop by when you get the chance:
www.karismaheartsavannah.blogspot.com
Congrats on your CSI win! Love the calendar...great job!
Love this project! Congratulations on winning the CSI Challenge this week.
I love that the countdown happens with chalk and you {I} don't have to make a bunch of numbered tags to flip or change or keep track of. really smart and cute.
What a great idea! Turned out cute!
What a great project!!! Thanks SO much for joining in on Thrilling Thursdays @ Paisley Passions. I love to see the creative talent of other fellow bloggers. Hope you to see you again soon :)
~Lori S.
Thrilling Thursdays @Paisley Passions
This is so cute! I'm your newest follower!
Melissa
http://burstsofcreativity.blogspot.com/
I saw this on CSI - what a cute idea! I love that you can use it for EVERYTHING - including birthdays - a great way to make your kids feel special.
Thanks for commenting on my spice jars! I'm a follower now (so I guess you can call us the fab 15 now?!) :)
Post a Comment