9.23.2010

Big List Of Silhouette Giveaways! (EXPIRED)


Have you noticed lately all of the Silhouette Giveaways out there?  Have you been entering them?  If not, you really should!  I know because I won one this summer at Mom Advice.com!  Talk about total shock!  I was really hoping and my wish came true.  You can win too, it is possible.  I've put together a list of the sites I've found that are currently giving away Silhouette Craft Cutters.  I want you to be as excited as I was. :)  If you know of any others, leave a comment and I'll add them to the list.

Good Luck! 


Pin It!

9.22.2010

2x4 Pumpkins

Here's a fun little craft that costs very little to make.
 

Last fall when I was searching around for some cute fall craft ideas, I saw this post here at It's a Daisy Day!  She used scrap 2x4's to make the cutest pumpkins.  I quickly realized that I had everything I needed to make them myself.  I even had 2x4 pieces that were already the right sizes!   The 2x4's are 3 1/2", 6", and 8 1/2" tall. 

Directions:
1. Paint the blocks.  (I used Pumpkin Orange.)
2. Sand all edges.
3. Apply a brown wash with a rag or sponge brush by brushing it on and then wiping the excess off with a dry rag or paper towel. 
 (To make a brown wash add a squirt of dark brown paint to about 1/2 cup of water.)
4.  Cut off 3 pieces of a dry branch for the stems.  (Large pruners work great for this.)
5.  Drill a hole into the top of each pumpkin large enough for the branch to fit in and then glue it in place with wood or hot glue.
6.  Cut a piece of wire then curl the ends by wrapping the wire around a screwdriver or pencil.  Wrap it around the stem to hold it in place.
7.  Glue spanish moss around the base of the stem.  This hides the hole.  Tie a raffia and a ribbon bow then glue them on.

Edited to Add:  I've found it's not necessary to drill the hole to add the stem, just glue it on with plenty of hot glue.  Click here for directions on how to make 2x4 Pumpkin Kits for a Ladies Craft Night.


That's it, you're done! 


This post is linked to:
 
Tator Tots and Jello
The DIY Showoff

Get Your Craft On Tuesday

Frugal Friday at The Shabby Nest
 Photobucket

Pin It!

9.18.2010

Lemon Crumb Squares

 BY FAR my very favorite lemon bars. 


I first ate one of these scrumptious bars at a church sponsored recipe exchange and tasters table (hands down the best way to find new recipes) and boy am I glad to have it!  If you like crumb topping and you like lemon,  then this recipe is for you.

Be sure to read my tips after the recipe.  You may as well learn from my mistakes!
Lemon Crumb Squares

2 cans sweetened condensed milk
2 tsp lemon zest (chopped or finely grated)
1 cup lemon juice

Mix ingredients and set aside.

1 1/3 cups softened butter
2 cups brown sugar
3 cups sifted unbleached white flour
2 tsp baking powder
1 tsp salt
2 cups oats

Cream the butter and sugar together.  Combine dry ingredients and mix until crumbly.  Spread 1/2 of crumb mixture in greased 9 x 13 pan.  Pat gently.  Spread with milk mixture then cover with the rest of crumb mixture.  Bake at 350 degrees for 25-35 minutes.


Okay, so here's what I did wrong.  The first time I made them I made the mistake of mixing the crumb mixture with an electric mixer.  I know now it's not a great idea because it makes the topping very dry.  The second time I made them I stirred the dry ingredients in with a wooden spoon and then used my hand to squeeze the crumb mixture making sure that all of the dry mixture was moist and crumbly.  

This recipe makes a large amount of crumb topping.  I found that putting 2/3 of it on the bottom for the crust and the other 1/3 for the topping worked well too.  You might even want to 2/3 the recipe and put 1/2 of it on the bottom and the other half on the top.  

Be careful not to overbake them.  If you cook them too long the crust will get hard.

There you go, all the info. you need (and then some). 

Enjoy!


This post is linked to:
 
brown paper packages
 
Pin It!

9.16.2010

How to Make an Eddy/Engineer Cap

Last year for Halloween my then two year old wanted to dress up as a 'train'.  I convinced him to be an engineer and steer the train.  I was too cheap to buy the engineer hat that I saw in the store so I ran a search to find a free pattern to make one.  I hit the jackpot.  I found a tutorial here at Mushroom Villagers with detailed directions and pictures too!  It was pretty simple to make and only ended up costing a couple of dollars.  I used heavy weight pillow ticking from JoAnns and of course bought the fabric with a 40% off coupon.  I'm very happy with how it turned out.


The train costume was first made for my oldest son when he was 4.  Yes, I saved it (under the stairs) in hopes we'd be able to use it again.  I couldn't stand the thought of throwing it away.  I'll post sometime about how I made it.  You'd be amazed at how simple it is.
 
Edited to add:  Click Here for a tutorial on how to make the train costume.
 
I had so much fun making the Eddy cap for the costume I wanted to try one for my daughter.  It was even easier this time because I learned a little trick when cutting it out, that saved me a lot of time.  Follow the tutorial, but when you cut out the bands, cut them the same width.  This will allow you to turn the edge of the band under and stitch it with the machine so you don't have to handstitch anything. 


I was very excited with how easy and cheap it was.  This hat cost me $1.50 to make!  I had the flower and interfacing already and I used 40% off coupons for the fabric at JoAnns. 
 
Oh, how I love a great deal!!!

Pin It!

9.08.2010

5 Things We Learned About Edible Cookie Dough

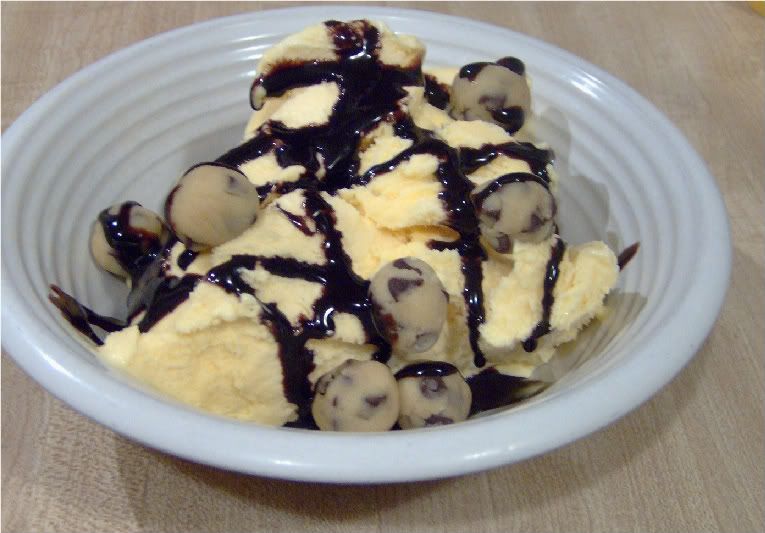
I finally got around to trying the Cookie Dough Recipe I talked about here, and I have to say it was pretty good.  The dough is made without eggs so it is okay to eat it un-cooked.  I made it with my kids on the last day of summer vacation for a little treat. 
 
Here's what we learned:
 
1. We love it with mini chocolate chips.
 
 
2.  Dipping the cookie dough balls in melted chocolate chips is too rich for our liking.
 
3.  You can make your own cookie dough ice cream by rolling the dough into small balls, freezing them, and serving them with ice cream and chocolate topping.  


4.  They are easy to keep in a ziploc bag in the freezer--and way too easy to grab one whenever you want!
 
5.  We will definately try making edible cookie dough again.
 
Pin It!

LinkWithin

Related Posts with Thumbnails