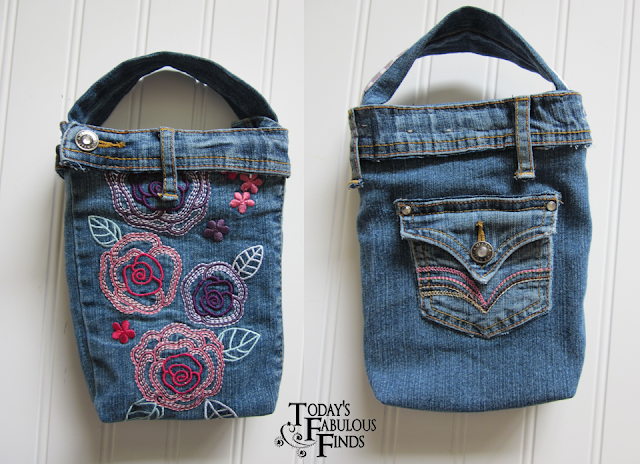
Directions:
Cut the bottom of the jeans off at the height that you want your bag. Add extra for a flap at the top and for the seam at the bottom of the bag. (Since my daughter is using this bag for her scriptures, we put them inside the jeans to measure how tall the bag needed to be.)
To sew a pocket on: Cut the pocket out of the jeans by cutting right along the outside edge and through both layers of denim. Pin it onto the bag and then stitch right next to the outside edge of the pocket, then stitch again about 1/4 inch in from the first stitching. If you match the thread color to the denim, you won't even notice the stitching lines.
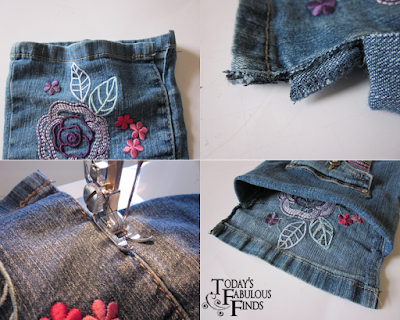
To stitch the bottom of the bag, turn the pant leg inside out and then upside down. Stitch across the unhemmed edge and then stitch across each corner to make the bottom of the bag.

To make a flap, cut the bag down on each side (right next to the side seam of the jeans), fold the front down and stitch the sides to hold it in place. I made this one so that the flap closes on the inside of the bag (she really wanted a flap to close). If you don't add the belt loop, you could close the flap to the outside of the bag. Stitch on a piece of velcro or add a snap to the flap to keep it closed.
To add a belt loop (pen pocket), cut the top of the jeans off next to the stitching, cutting around the bottoms of the belt loops as you go. (Don't unpick the thread, just cut up close to the stitching on the belt loop.) Pin the top of the jeans around the top of the bag and then stitch it at the top and the bottom. Cut, then fold the end of the waistband under and stitch it at the end. (This makes a little pocket that is just the perfect size for a pen.) Stitch the belt loops to the bag.
To add a handle, cut up the side of the pant leg (against the stretch of the jean) so their is a seam on one side. Open it up and fold the two sides in so the cut edges are in the center and the seam is on the bottom in the center. Sew a piece of ribbon on top, over the cut edges, along each side of the ribbon. (This will enclose the raw edges.) Turn the end of the handle in, that isn't already hemmed, and stitch it to the inside of the bag. Stitch the hemmed side to the other side of the bag. You're done!
I pushed the bottom of the bag up to show you how it would look as a purse. For a purse I would make two handles instead of one. Bright colored wide ribbon or a scarf for the handles would be so pretty, don't you think?
I also made a scripture bag for my son that is similar, but with the flap on the outside and the handle on the side. He picked out the fabric all by himself, can you tell? ;)


