I've seen letter photo art around for awhile now, but for some reason I suddenly became
very interested in it this week and just
had to try making one, like right away, so I chose the word 'LOVE' and got right to work.
My four year old helped me search our yard for 'letter shapes'. We found the 'L' on the wheel barrow, the 'O' in a daisy, the 'V' on a log in the wood pile, and the 'E' on the fence gate. We had fun, made a craft,
and practiced the alphabet all at the same time. Can't beat that!
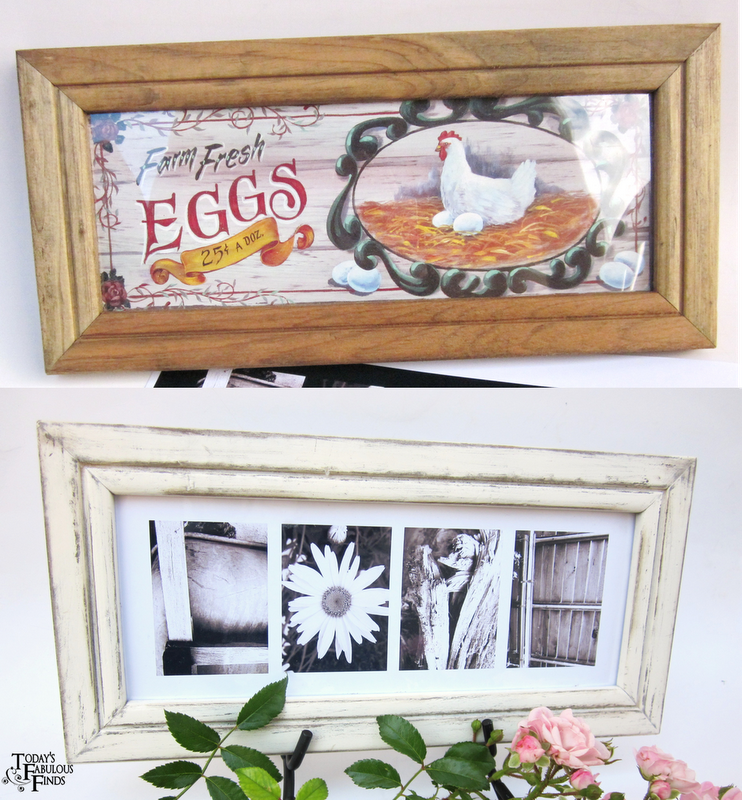
I started with just a plain 5 1/2" x 11 1/2" wood frame from the dollar store that had a chicken picture in it.
The wood was rough so it needed a little sanding before being painted. I stained the frame in dark walnut (to show through when it was distressed), spray painted it with Rustoleum's Heirloom White, and then distressed it. I did end up needing to add a touch of stain in the distressed areas with a small rag to darken it a bit more, probably because the stain wasn't completely dry when I painted it. I know, should have waited, but it was getting dark and I wasn't feeling very patient at the time. I was too excited to see how it would look when it was done! :)
I used a point and shoot camera on the macro setting to take the pictures then edited and cropped them to make the 'letters' in the photos stand out as much as possible.
After searching and searching online for free printable letter art, I wasn't able to find any, so if you'd like to use the one I made, you're more than welcome to. Just click on the image to bring it to full resolution and then save it to your computer.
FOR PERSONAL USE ONLY
*Please don't post these prints on your blog, thanks!
Sepia
Black and White
There are two side by side images here because this is how I printed mine. I figured I might as well print two at a time and not waste the extra photo paper. Just crop it to one image in a photo editing program before you print if you only need one.
Printing in Microsoft Photo Gallery
Open the image in photo gallery, select print, then select the paper size you want. (I selected letter.) Unselect 'fit picture to frame', then choose a template (I selected full page.). After printing it onto 8 1/2 by 11 photo paper (check your dollar store), I cut the image down to fit the size of the opening in my frame. I didn't get this right the first time, so if you're not sure if the size is right, print a rough draft onto regular paper first to check.
More Ideas
You could also print the image and then decoupage it onto a board, I have a few ideas in mind that I want to try that involve letter art and Mod Podge, I'll share them with you when I get a chance to try them.
One more look at the before and after...
This frame will hang as part of a grouping of family photos. I love that the pictures for the letters came from our own backyard, so they have meaning as well. If you have never tried this before, I highly recommend it, like I said, it's so fun! It might even change the way that you look at the world, you might start seeing it in letters. :)
Today's Fabulous Find...Letter Photo Art
I'm linking up to these fun parties.
Click here to browse by the buttons.
All Thingz Related Be Different Act Normal Beyond The Picket Fence Blue Cricket Design Chic on a Shoestring Creation Corner Creations By Kara Designer Gardens Dittle Dattle Domestically Speaking Embellishing Life Everyday Finding Fabulous Fingerprints On The Fridge Funky Junk Interiors House of Hepworths I Heart Naptime Just A Girl Keeping It Simple Serenity Now Seven Thirty-Three Sew Can Do Sew Much Ado Shanty 2 Chic Sister's Stuff Skip To My Lou Someday Crafts Somewhat Simple Sugar Bee Crafts Tator Tots and Jello The Creative Crate The DIY Showoff The Girl Creative The Shabby Creek Cottage The Shabby Nest Tip Junkie Today's Creative Blog Under The Table and Dreaming Home is Where My Story Begins The 36th Avenue